Berikut ini cara install dan konfigurasi Nginx di Linux Debian 9
Nginx dapat diinstall dengan command
apt-get install nginx
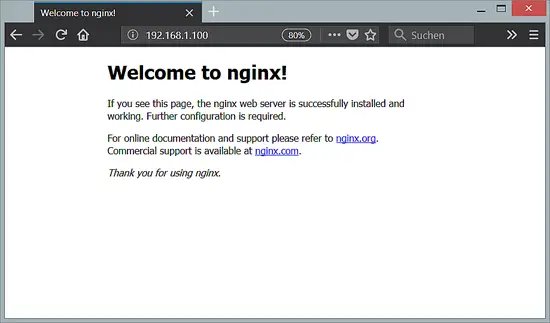
Kemudian anda bisa melihat nginx anda sudah bisa di akses dengan browser anda dengan mengetikkan IP Address Server atau domain di URL Browser. contoh saya menggunakan IP Address : 192.168.1.100
Install PHP 7.2
Install PHP 7.2 beserta modul-modulnya dengan command
apt-get install php7.2 php7.2-mysql php7.2-fpm php7.2-mbstring php7.2-xml php7.2-curl php7.2-json php7.2-pgsql
note :
php7.2-pgsql (modul untuk Postgresql)
php7.2-mysql (modul untuk MySql)
Konfigurasi Nginx
kemudian konfigurasi nginx di /etc/nginx/nginx.conf dengan command
nano /etc/nginx/nginx.conf
Set keepalive_timeout menjadi 2
keepalive_timeout 2;
Kemudian save konfigurasi dengan cara CRTL+X, kemudian tekan Y dan enter
Virtual Host didefiniskan di dalam server {} , VHost dapat dikonfigurasi di dalam /etc/nginx/sites-available/default dengan command
nano /etc/nginx/sites-available/default
Masukkan Sesuai Konfigurasi berikut ini :
server {
listen 80 default_server;
listen [::]:80 default_server;
# SSL configuration
#
# listen 443 ssl default_server;
# listen [::]:443 ssl default_server;
#
# Note: You should disable gzip for SSL traffic.
# See: https://bugs.debian.org/773332
#
# Read up on ssl_ciphers to ensure a secure configuration.
# See: https://bugs.debian.org/765782
#
# Self signed certs generated by the ssl-cert package
# Don't use them in a production server!
#
# include snippets/snakeoil.conf;
root /var/www/html;
# Add index.php to the list if you are using PHP
index index.php index.html index.htm index.nginx-debian.html index.php;
server_name _;
location / {
# First attempt to serve request as file, then
# as directory, then fall back to displaying a 404.
try_files $uri $uri/ =404;
}
# pass PHP scripts to FastCGI server
#
location ~ \.php$ {
include snippets/fastcgi-php.conf;
# With php-fpm (or other unix sockets):
fastcgi_pass unix:/var/run/php/php7.2-fpm.sock;
# With php-cgi (or other tcp sockets):
# fastcgi_pass 127.0.0.1:9000;
}
# deny access to .htaccess files, if Apache's document root
# concurs with nginx's one
#
location ~ /\.ht {
deny all;
}
}
Kemudian save konfigurasi dengan cara CRTL+X, kemudian tekan Y dan enter
Sekarang buat file info.php di /var/www/html, agar bisa melihat apakah phpnya sudah berjalan lancar atau belum dengan command
nano /var/www/html/info.php
kemudian masukkan script php berikut ini
<?php
phpinfo();
?>
Kemudian save script info.php dengan cara CRTL+X, kemudian tekan Y dan enter
Kemudian restart nginx dengan command
/etc/init.d/nginx restart
Sekarang anda bisa memanggil info.php tadi di browser dengan mengetikkan : http://192.168.1.100/info.php

ketika tampilan sudah seperti gambar di atas berarti PHP anda sudah berjalan dengan baik
------------------------------------------------------------------------------------------------------------
NB : jika menghendaki nginx bisa auto index bisa menambahkan konfigurasi dibawah ini di /etc/nginx/sites-available/default
autoindex on;
Nginx dapat diinstall dengan command
apt-get install nginx
Kemudian anda bisa melihat nginx anda sudah bisa di akses dengan browser anda dengan mengetikkan IP Address Server atau domain di URL Browser. contoh saya menggunakan IP Address : 192.168.1.100
Install PHP 7.2
Install PHP 7.2 beserta modul-modulnya dengan command
apt-get install php7.2 php7.2-mysql php7.2-fpm php7.2-mbstring php7.2-xml php7.2-curl php7.2-json php7.2-pgsql
php7.2-pgsql (modul untuk Postgresql)
php7.2-mysql (modul untuk MySql)
Konfigurasi Nginx
kemudian konfigurasi nginx di /etc/nginx/nginx.conf dengan command
nano /etc/nginx/nginx.conf
Set keepalive_timeout menjadi 2
keepalive_timeout 2;
Kemudian save konfigurasi dengan cara CRTL+X, kemudian tekan Y dan enter
Virtual Host didefiniskan di dalam server {} , VHost dapat dikonfigurasi di dalam /etc/nginx/sites-available/default dengan command
nano /etc/nginx/sites-available/default
Masukkan Sesuai Konfigurasi berikut ini :
server {
listen 80 default_server;
listen [::]:80 default_server;
# SSL configuration
#
# listen 443 ssl default_server;
# listen [::]:443 ssl default_server;
#
# Note: You should disable gzip for SSL traffic.
# See: https://bugs.debian.org/773332
#
# Read up on ssl_ciphers to ensure a secure configuration.
# See: https://bugs.debian.org/765782
#
# Self signed certs generated by the ssl-cert package
# Don't use them in a production server!
#
# include snippets/snakeoil.conf;
root /var/www/html;
# Add index.php to the list if you are using PHP
index index.php index.html index.htm index.nginx-debian.html index.php;
server_name _;
location / {
# First attempt to serve request as file, then
# as directory, then fall back to displaying a 404.
try_files $uri $uri/ =404;
}
# pass PHP scripts to FastCGI server
#
location ~ \.php$ {
include snippets/fastcgi-php.conf;
# With php-fpm (or other unix sockets):
fastcgi_pass unix:/var/run/php/php7.2-fpm.sock;
# With php-cgi (or other tcp sockets):
# fastcgi_pass 127.0.0.1:9000;
}
# deny access to .htaccess files, if Apache's document root
# concurs with nginx's one
#
location ~ /\.ht {
deny all;
}
}
Kemudian save konfigurasi dengan cara CRTL+X, kemudian tekan Y dan enter
Sekarang buat file info.php di /var/www/html, agar bisa melihat apakah phpnya sudah berjalan lancar atau belum dengan command
nano /var/www/html/info.php
kemudian masukkan script php berikut ini
<?php
phpinfo();
?>
Kemudian save script info.php dengan cara CRTL+X, kemudian tekan Y dan enter
Kemudian restart nginx dengan command
/etc/init.d/nginx restart
Sekarang anda bisa memanggil info.php tadi di browser dengan mengetikkan : http://192.168.1.100/info.php

ketika tampilan sudah seperti gambar di atas berarti PHP anda sudah berjalan dengan baik
------------------------------------------------------------------------------------------------------------
NB : jika menghendaki nginx bisa auto index bisa menambahkan konfigurasi dibawah ini di /etc/nginx/sites-available/default
autoindex on;
EmoticonEmoticon